Table of Contents
GIM & S-Tap Download
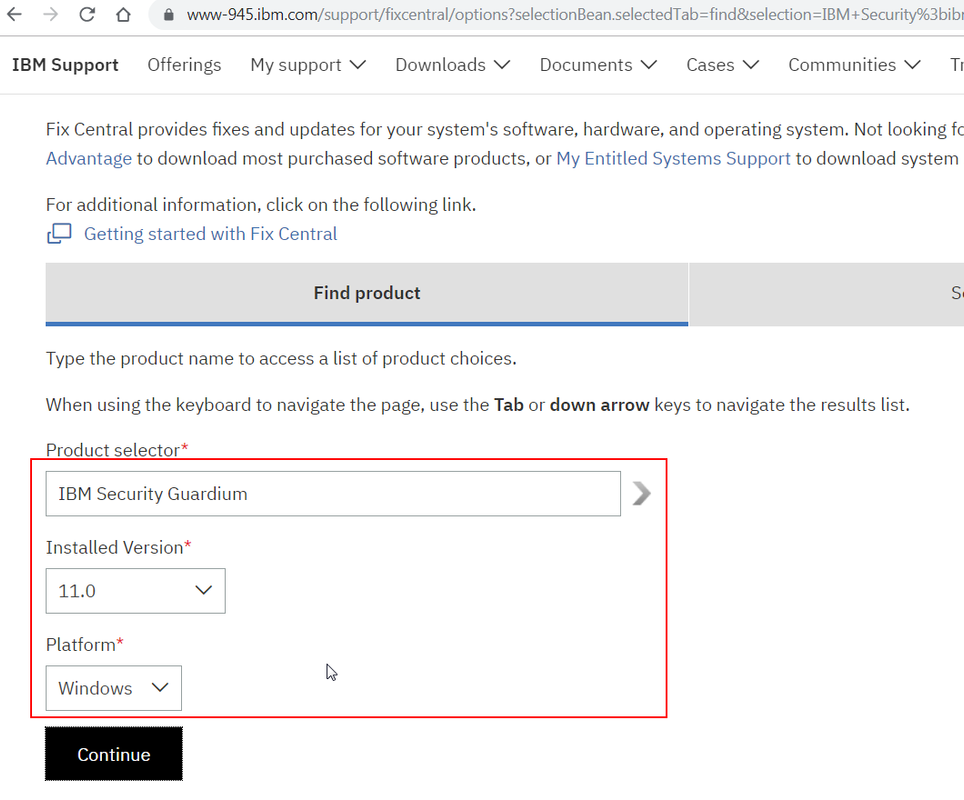
1.) Download GIM to Assigned Database servers
2.)
Select
the current/correct Fix Pack.
Select
the current/correct Fix Pack.
This
implementation is Guardium v11 GIM, S-TAP, GIM AIX & S-TAP AIX
implementation is Guardium v11 GIM, S-TAP, GIM AIX & S-TAP AIX
GIM & S-Tap Installation
3.)
Install
only GIM Client on database server (.sh)
Install
only GIM Client on database server (.sh)
Note: require root and executable permission
a)
Log onto LPAR
Log onto LPAR
b)
Sudo to Root
Sudo to Root
c)
Upload
guard-bundle-GIM-9.0.0_r73521_v90_1-aix-6.1-aix-powerpc.gim.sh to temp dir
Upload
guard-bundle-GIM-9.0.0_r73521_v90_1-aix-6.1-aix-powerpc.gim.sh to temp dir
d)
chmod +x guard-bundle-GIM-9.0.0_r73521_v90_1-aix-6.1-aix-powerpc.gim.sh
chmod +x guard-bundle-GIM-9.0.0_r73521_v90_1-aix-6.1-aix-powerpc.gim.sh
e)
Install script using following command,
./guard-bundle-GIM-9.0.0_r73521_v90_1-aix-6.1-aix-powerpc.gim.sh — –dir
/usr/local/guardium –-tapip <IP
Address of LPAR being installed on> –sqlguardip CollecterIP
Install script using following command,
./guard-bundle-GIM-9.0.0_r73521_v90_1-aix-6.1-aix-powerpc.gim.sh — –dir
/usr/local/guardium –-tapip <IP
Address of LPAR being installed on> –sqlguardip CollecterIP
4.)
Once
install script complete run following command ps -ef| grep module
Once
install script complete run following command ps -ef| grep module
5.)
Check
to see if GIM client is running: ps -ef
| grep gim
Check
to see if GIM client is running: ps -ef
| grep gim
5.)
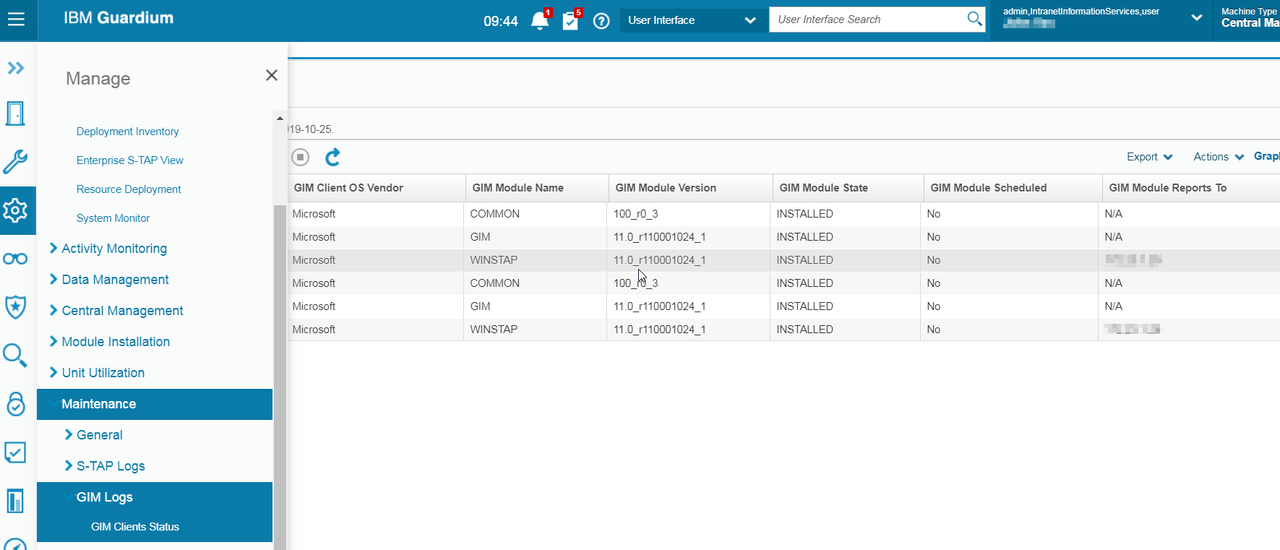
6.)
Check
to see if GIM is connected to Guardium appliance
Check
to see if GIM is connected to Guardium appliance
(a)
log
into Guardium appliance
log
into Guardium appliance
(b)
Go
to the Admin Console -> Module installation -> process monitoring
Go
to the Admin Console -> Module installation -> process monitoring
7)
Upload
GIM and STAP server and Discovery agent (gim)
Upload
GIM and STAP server and Discovery agent (gim)
7)
a)
Locate
the current/correct gim/stap from fix central and download (See Item 2)
Locate
the current/correct gim/stap from fix central and download (See Item 2)
b)
Log
into Central Manager.
Log
into Central Manager.
c)
Go
to the Admin Console -> Module installation -> upload -> browse
(select .gim files) for STAP, GIM and Discovery
Go
to the Admin Console -> Module installation -> upload -> browse
(select .gim files) for STAP, GIM and Discovery
d)
Check
and click upload
Check
and click upload
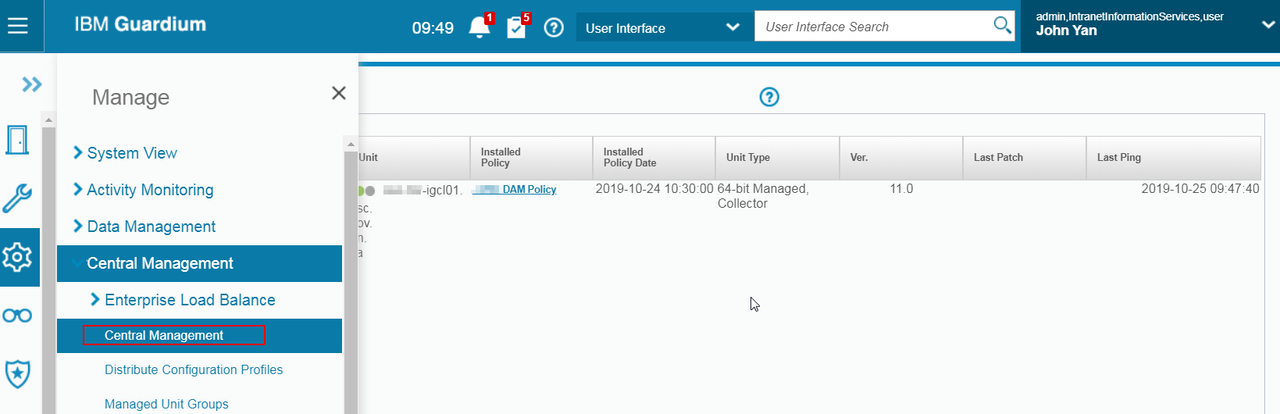
8)
Distribute
GIM modules to all collectors
Distribute
GIM modules to all collectors
a.
Log
into Central Manager.
Log
into Central Manager.
b.
Go
to Admin Console -> Central Management ->
Central Management -> select all collectors
Go
to Admin Console -> Central Management ->
Central Management -> select all collectors
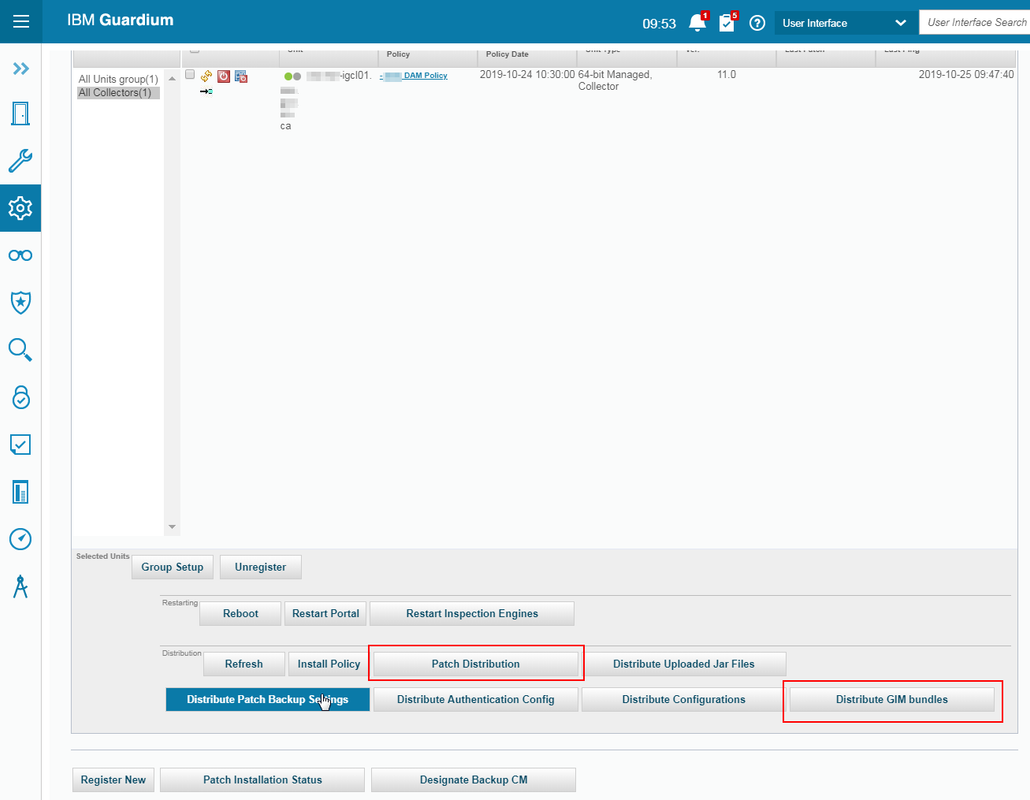
c.
Click
on ‘Distribute GIM Bundles
Click
on ‘Distribute GIM Bundles
9.)
Install
S-Tap from GIM (push down to database server)
Install
S-Tap from GIM (push down to database server)
a)
Log
into Collector
Log
into Collector
b)
Go
to the Admin console -> module installation – > Setup by Client ->
Search -> select the database you want to install STAP -> choose Next
Go
to the Admin console -> module installation – > Setup by Client ->
Search -> select the database you want to install STAP -> choose Next
10.)
Select
‘BUNDLE_STAP_xxxxx’, Select STAP
Select
‘BUNDLE_STAP_xxxxx’, Select STAP
11.)
Click
Next
Click
Next
12.)
Apply
the following parameters
Apply
the following parameters
a.
ktap_enabled
= 1,
ktap_enabled
= 1,
b.
KTAP_ALLOW_MODULE_COMBOS = Y,
KTAP_ALLOW_MODULE_COMBOS = Y,
c.
KTAP_LIVE_UPDATE
= Y,
KTAP_LIVE_UPDATE
= Y,
d.
STAP_TAP_IP
= database ip,
STAP_TAP_IP
= database ip,
e.
STAP_SQLGUARD_IP
= collector ip
STAP_SQLGUARD_IP
= collector ip
13.)
Click
“Apply to Clients”
Click
“Apply to Clients”
14.)
Click
“Install/Update”
Click
“Install/Update”
15.)
Type “Now”
Type “Now”
16.)
Click
“apply’ & Install
Click
“apply’ & Install
17.)
Verify
if S-TAP is installed on database
Verify
if S-TAP is installed on database
18.)
Click
“Refresh” and status to be “Installed”.
19).
Go to “Tap Monitor”->STAP
Events
Click
“Refresh” and status to be “Installed”.
19).
Go to “Tap Monitor”->STAP
Events
Go to “Tap Monitor”->STAP Status
Note: This will be on Collector, not Aggregator.

19.)
Instance
Discovery install:
Instance
Discovery install:
a)
Go
to the Admin console -> module installation – > Setup by Client ->
Search -> select the database you want to install Discovery-> choose Next
Go
to the Admin console -> module installation – > Setup by Client ->
Search -> select the database you want to install Discovery-> choose Next
b)
Select
“Bunder-Discovery_xxxxx” and click “next”
Select
“Bunder-Discovery_xxxxx” and click “next”
c)
Apply
the following parameters:
Apply
the following parameters:
·
DISCOVERY_JAVA_DIR is set to Database java path(example
/usr/java6_64/jre)
DISCOVERY_JAVA_DIR is set to Database java path(example
/usr/java6_64/jre)
·
DISCOVERY_TAP_IP is set to Database IP (example 10.49.235.89)
DISCOVERY_TAP_IP is set to Database IP (example 10.49.235.89)
·
DISCOVERY_SQLGUARD_IP is set to Collector IP (example:
10.49.136.11)
DISCOVERY_SQLGUARD_IP is set to Collector IP (example:
10.49.136.11)
d)
Click “Apply to Clients” and Click “Install/Update”.
Click “Apply to Clients” and Click “Install/Update”.
e)
Enter
“now” and click “apply”
Enter
“now” and click “apply”
19.)
Check
the install status as mentioned below by clicking the information box
Check
the install status as mentioned below by clicking the information box
20.)
Instilation Status information Box
Instilation Status information Box
Installation of the
Discovery Agent on Guardium appliances
1.)
Add
“Inspection engine” from database instance discovery
Add
“Inspection engine” from database instance discovery
2.)
Go
to “Daily Monitor” and select “Discovered instances”
Go
to “Daily Monitor” and select “Discovered instances”
3.)
Double
click on the discovered instances for each row and select “Invoke”
Double
click on the discovered instances for each row and select “Invoke”
4.)
Select
“Create_stap_inspection_engine”
Select
“Create_stap_inspection_engine”
5.)
Click
“Invoke now”
Click
“Invoke now”
6.)
Click
“Close”
Click
“Close”
7.)
Verify
successful inspection installation from the instance discovery on the STAPS
Verify
successful inspection installation from the instance discovery on the STAPS
a)
Go
to “administration console”->Local Taps->S-TAP Control
Go
to “administration console”->Local Taps->S-TAP Control
b)
Select
each installed S-TAP and click + on the Inspection Engines
Select
each installed S-TAP and click + on the Inspection Engines
iLab LDAP setting:
1.)
Login
as admin and set the following:
Login
as admin and set the following:
2. Login as accessmgr and set the following:
Login
to Guardium with admin role
to Guardium with admin role
On
Admin Console tab select Portal
Admin Console tab select Portal