I am using Imgur to store my Blog photos for a long time, before it was PostImage, PhotoBucket and ImageShack. After tested with BackBlaze B2 service, especially integrated with ShareX and connected to CDN service provider Cloudflare, I decided to give a BackBlaze a try as my photo site to store all my Blog screenshots and photos.
The free plan at BackBlaze is 10G and Cloudflare can be configured to work with it very well. Also ShareX screen capture software can auto-generate my own domain url for those photos. It sounds quite promising to use it as blog photo bed. There is cap limit for class b and class c transactions. But usually the limit is good for a small website like mine.
This post is a summary for all steps for installation and configuration.
Table of Contents
Create and Configure Your BackBlaze Account
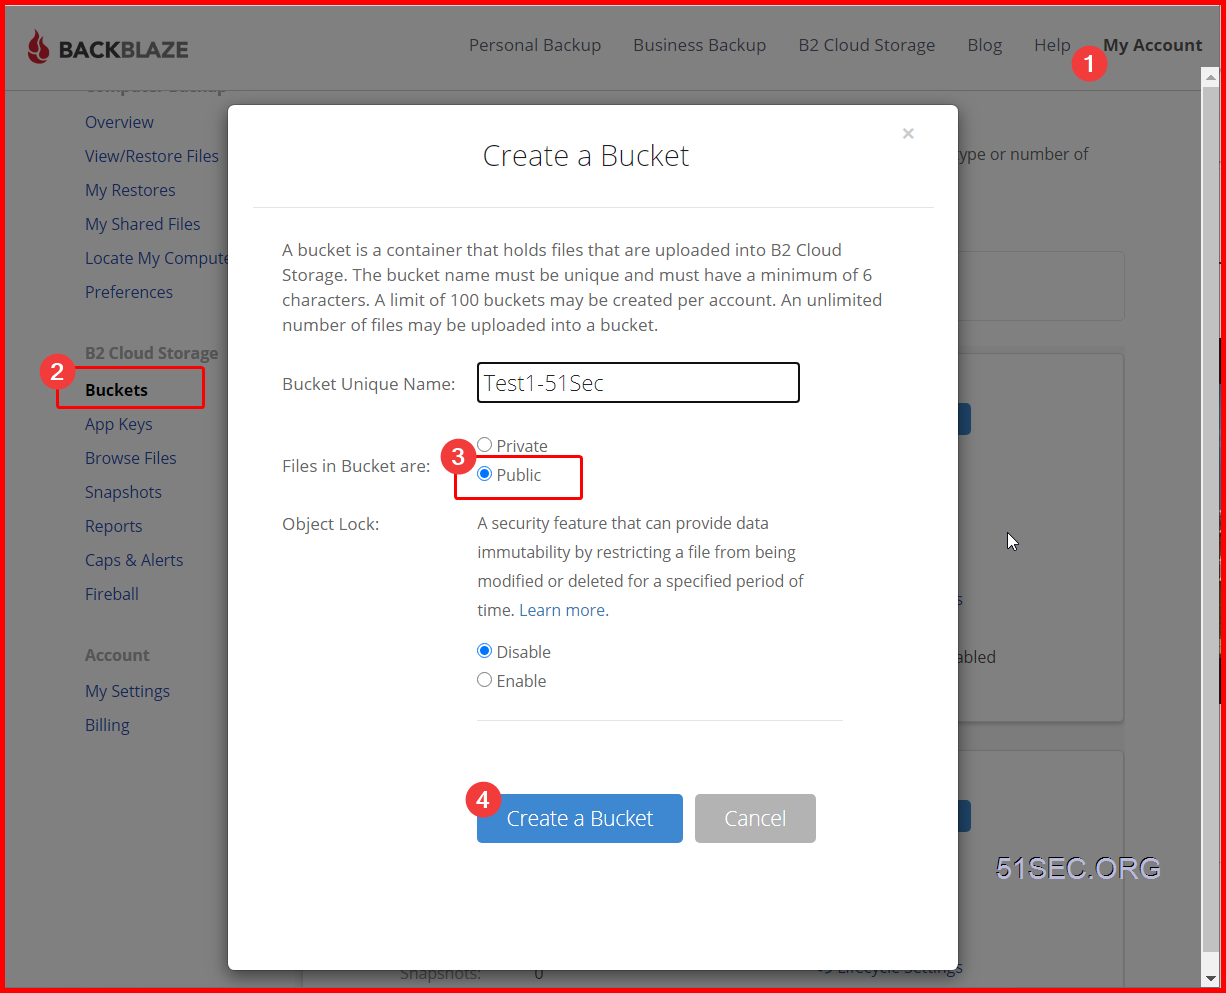
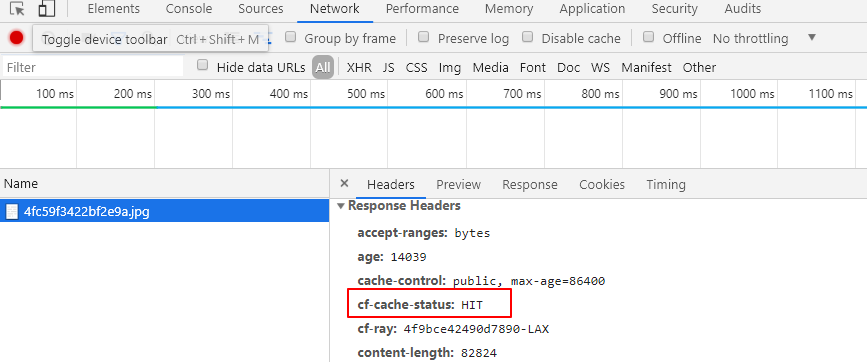
Here is an extra important step to set up your bucket. You will have to put one cache command into Bucket info: {“cache-control”:”max-age=43200″}
43200 is seconds. This means Cloudflare will not re-fetch the resource from source (BackBlaze) in 43200 seconds

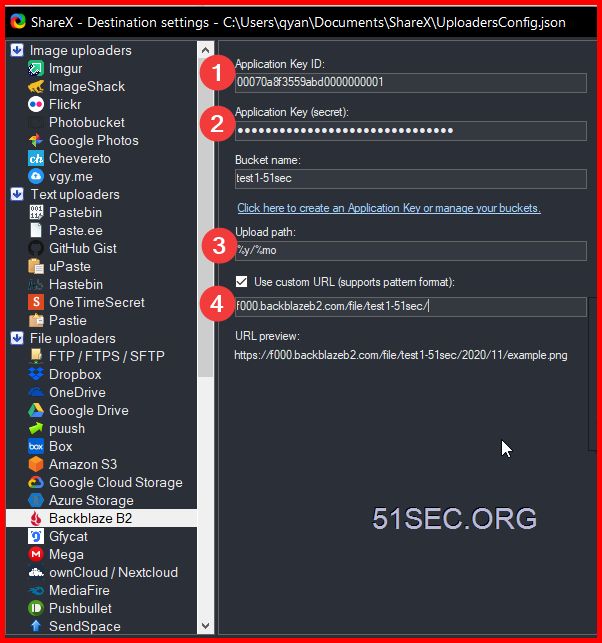
3 Upload a file to get Friendly URL:
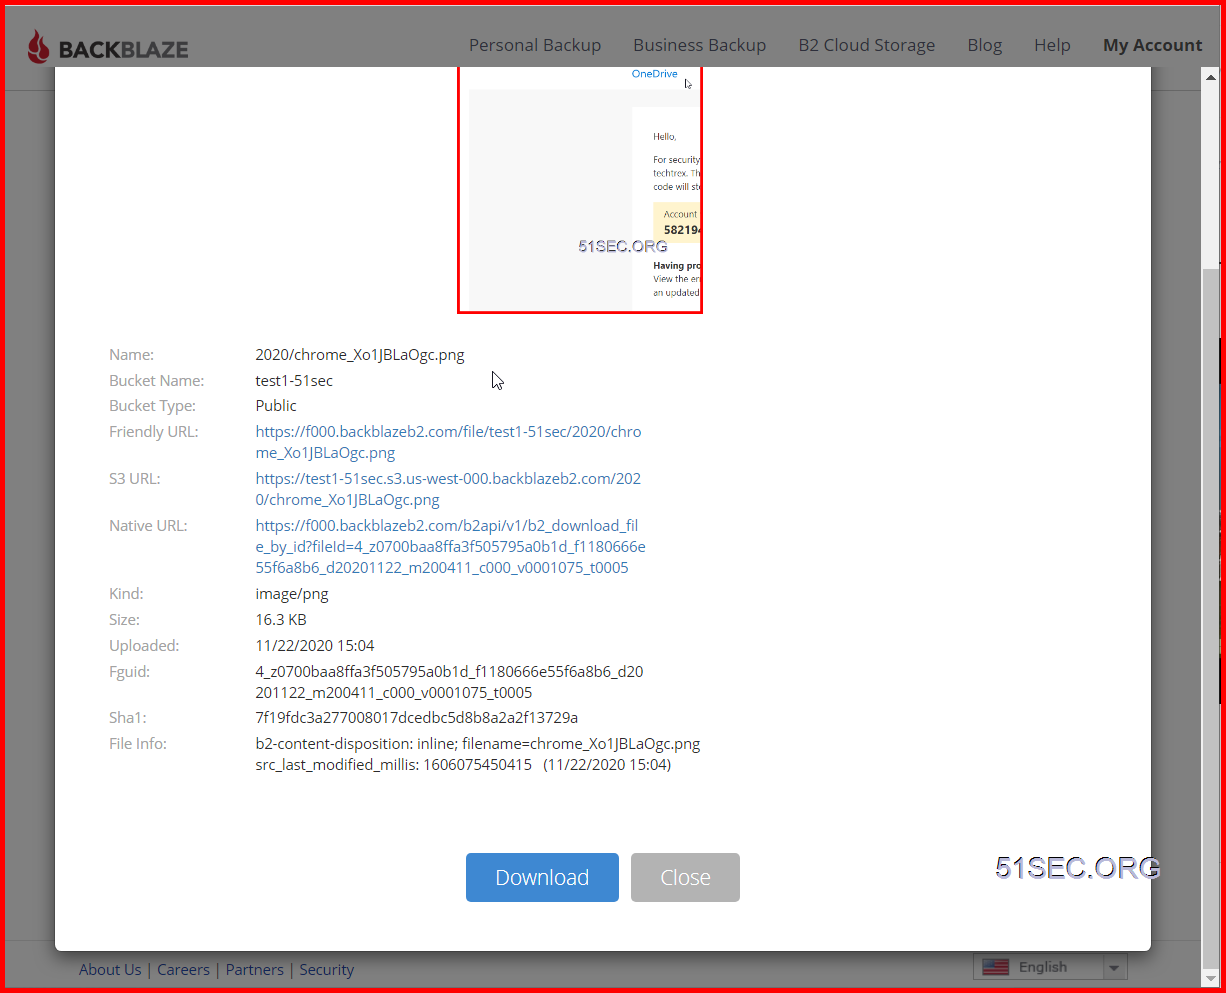
For example: I got following url starting with f000.backblazeb2.com/file. You will need this url to put it into ShareX and Cloudflare
Friendly URL:: https://f000.backblazeb2.com/file/test1-51sec/2020/chrome_Xo1JBLaOgc.png
test1-51sec is bucket name. 2020 is the folder I created in the bucket.
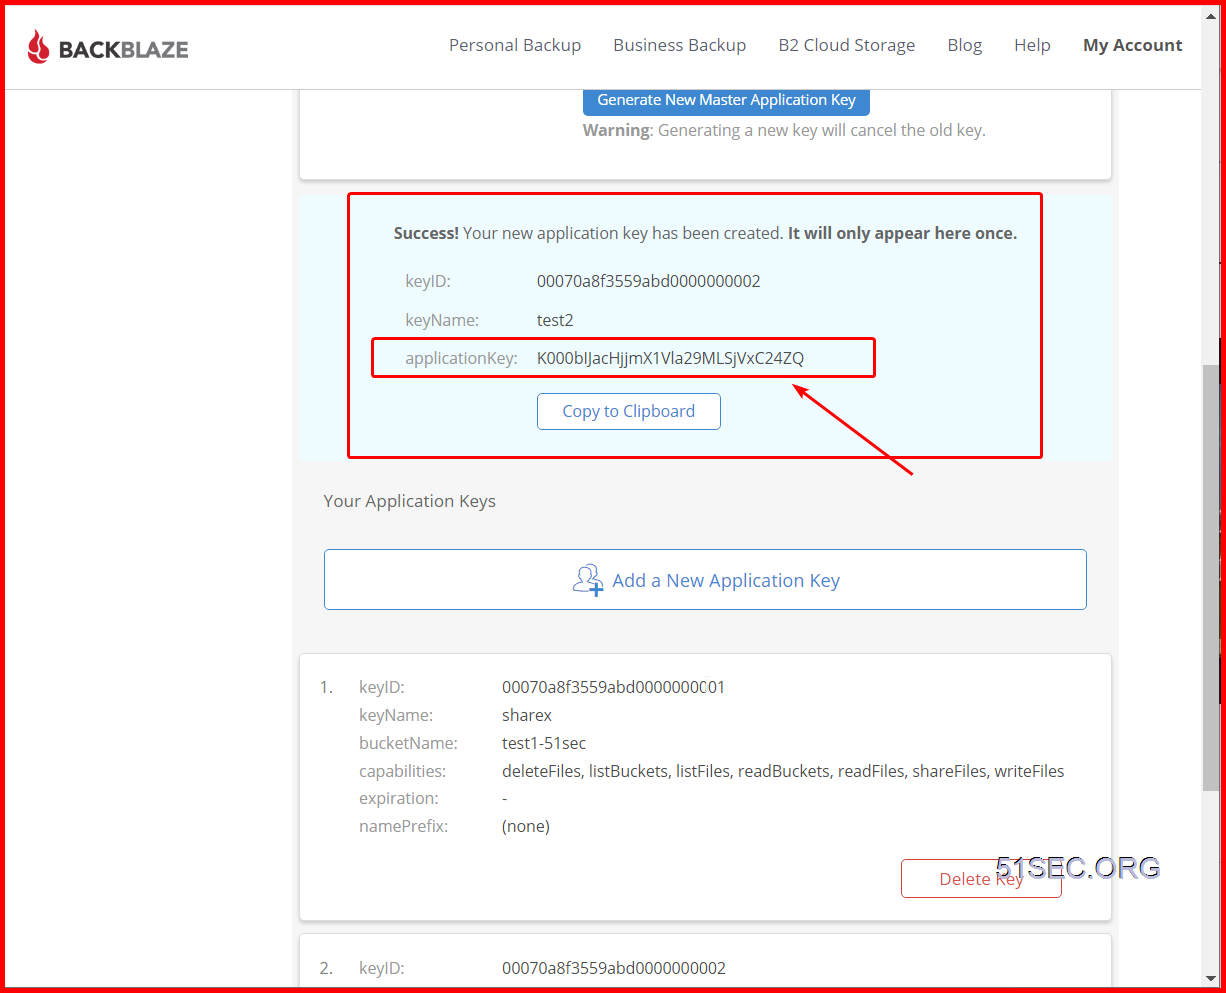
4 Add a New Application Key
The application key will only show once, and you will need it to access your bucket. But you can create multiple keys later.
Both KeyID and Application Key will be needed to allow ShareX to upload the photos into this bucket.
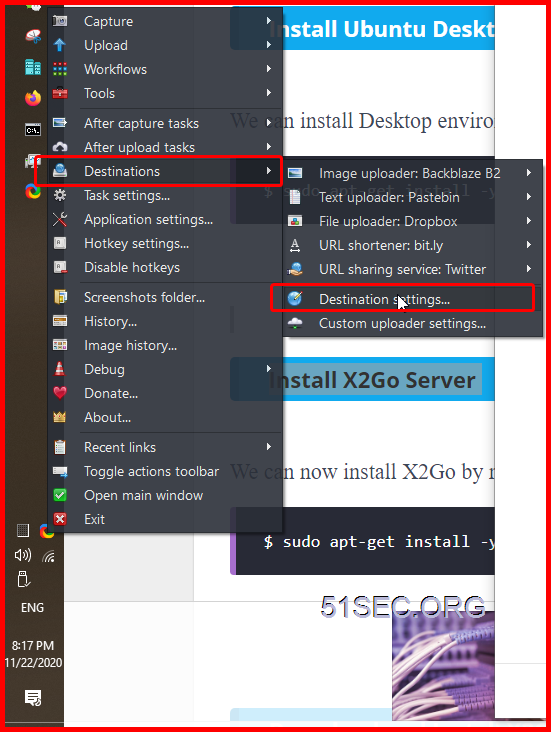
Configure ShareX
Configure Cloudflare

2 Create a page rule to cache this URL only when it is from 51sec.org.


Verify if using CloudFlare Cache
References
from Blogger http://blog.51sec.org/2020/11/create-own-cloud-photo-storage-site-in.html