All interaction between the SSC tenant and your on premises network uses our distributed engine service to communicate. The work tasks that distributed engine completes includes Active Directory authentication, password changing, and heartbeat. The machine where the engine is installed must be able to communicate outbound on ports 443 and 9354.
Table of Contents
SS Cloud Architecture:
Install the Distributed Engine
-
Navigate to Admin > Distributed Engine
-
Click the Download Engine Installer button for either 64-bit or 32-bit.
Note: You can install distributed engine on your workstation or laptop for testing purposes, but for production installs, the distributed engine server should be installed on a server. SS uses the distributed engine to communicate with your domain, so if your machine is turned off, users cannot log on with their domain accounts, and heartbeat and remote password changing will fail.
-
Run setup.exe as an administrator to install the engine service. This will install into
Thycotic Software Ltd\Distributed Engine. -
Go to Admin > Distributed Engine.
-
Click Manage Sites.
-
Click Manage New Engines. There should be a new engine available.
-
Click the Assigned Site dropdown list and select Default.
-
Approve it by clicking the check box to the right.
-
Validate the engine’s connectivity:
-
Go to Admin > Distributed Engine > Manage Sites.
-
Click the Default site.
-
Click the Validate Connectivity button to test the communication between the engine and SS. It may take several minutes for the engine to register. If it does not immediately validate wait a few minutes and try again.
-

Configure Active Directory Integration
Active Directory integration allows users to log in with their domain credentials. Connections to your domain are routed through the distributed engine service running in your network.
-
On the dashboard, create a new Active Directory secret from the create secret widget in the upper right hand corner.
Note: The domain account should be able to read users and groups from the domain you want to sync. For detailed information on the rights required, please see Active Directory Rights for Synchronization Account (KB).
-
Type the domain, username, and password in the Create Secret form.
-
Save the secret.
-
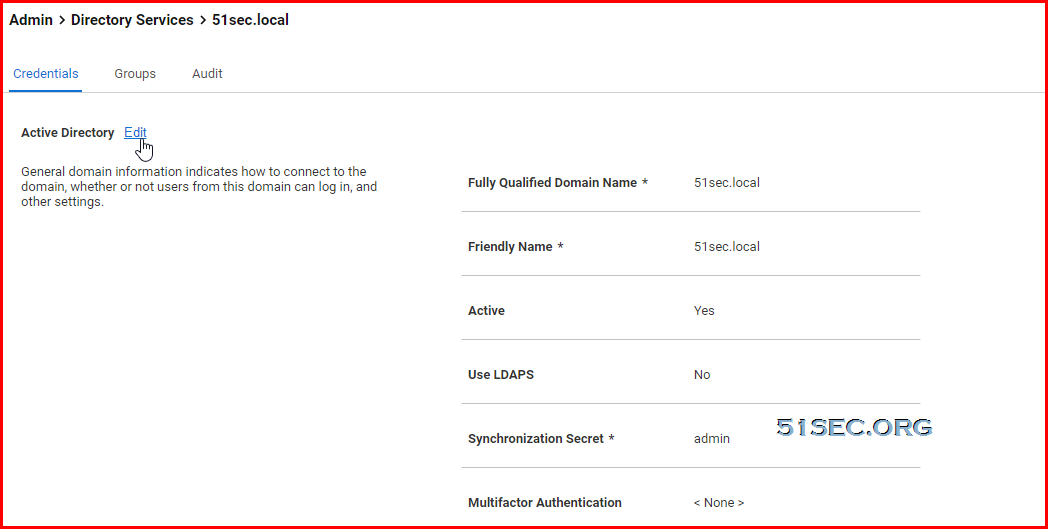
Navigate to Admin > Active Directory.
-
Click Edit and check the boxes for Enable Active Directory Integration and Enable Synchronization of Active Directory.
-
Click the Save button.
-
Click the Edit Domains button.
-
Click the Create New button.
-
Type your FQDN and a friendly domain name that users will see on the login page.
-
Click Sync Secret to select the secret you just created.
Note: The domain site is set to default. This means that the Active Directory authentication and synchronization will run through the distributed engine service installed on your network.
Note: Do not select “Enable Login from AD.” If you do, you cannot set the domain groups later in this instruction.
-
Click the Save and Validate button.
-
Click the Back button.
-
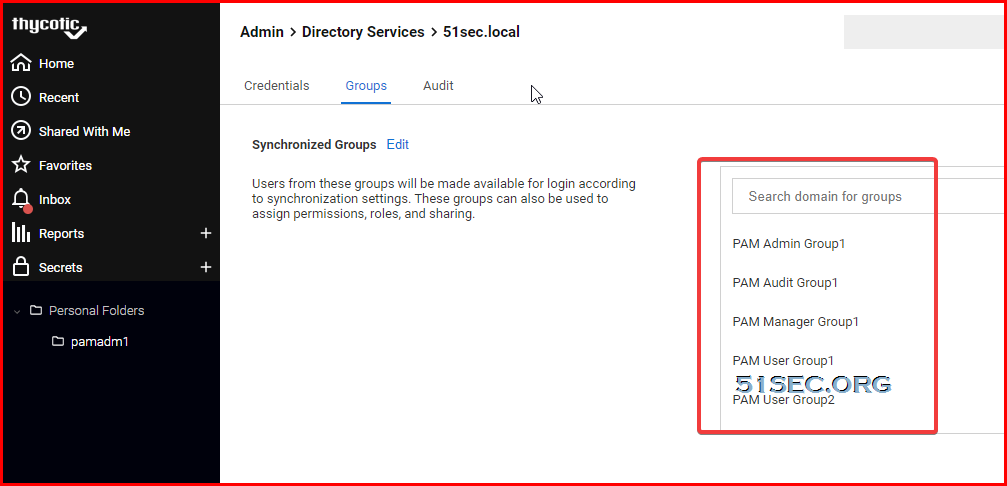
Click the Edit Synchronization button. The Synchronization Edit page appears.
-
In the Available Groups list, click each domain group that you want to log on in the SSC instance and click the the < button to move the group to the Synchronized Groups list.
-
Click the Save button.
-
Click the Synchronize Now button to start the user and group synchronization immediately. The synchronization process runs automatically, but to get immediate results, you can start it manually.
On the dashboard, create a new Active Directory secret from the create secret widget in the upper right hand corner.
Note: The domain account should be able to read users and groups from the domain you want to sync. For detailed information on the rights required, please see Active Directory Rights for Synchronization Account (KB).
Type the domain, username, and password in the Create Secret form.
Save the secret.
Navigate to Admin > Active Directory.
Click Edit and check the boxes for Enable Active Directory Integration and Enable Synchronization of Active Directory.
Click the Save button.
Click the Edit Domains button.
Click the Create New button.
Type your FQDN and a friendly domain name that users will see on the login page.
Click Sync Secret to select the secret you just created.
Note: The domain site is set to default. This means that the Active Directory authentication and synchronization will run through the distributed engine service installed on your network.
Note: Do not select “Enable Login from AD.” If you do, you cannot set the domain groups later in this instruction.
Click the Save and Validate button.
Click the Back button.
Click the Edit Synchronization button. The Synchronization Edit page appears.
In the Available Groups list, click each domain group that you want to log on in the SSC instance and click the the < button to move the group to the Synchronized Groups list.
Click the Save button.
Click the Synchronize Now button to start the user and group synchronization immediately. The synchronization process runs automatically, but to get immediate results, you can start it manually.
Test Heartbeat and Remote Password Changing
Heartbeat ensures the secrets you have stored have the correct password, and Remote Password Changing (RPC ) changes passwords on demand or a schedule.
-
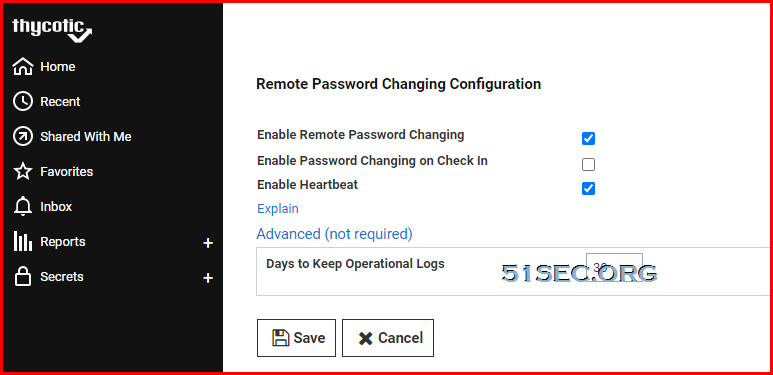
Navigate to Admin > Remote Password Changing.
-
Click the Edit button.
-
Click to select the Enable Remote Password Changing and Enable Heartbeat check boxes.
-
Click the Save button.
-
Click the Run Now button in the Remote Password Changing and Heartbeat Log sections. This runs the heartbeat and RPC processes immediately.
-
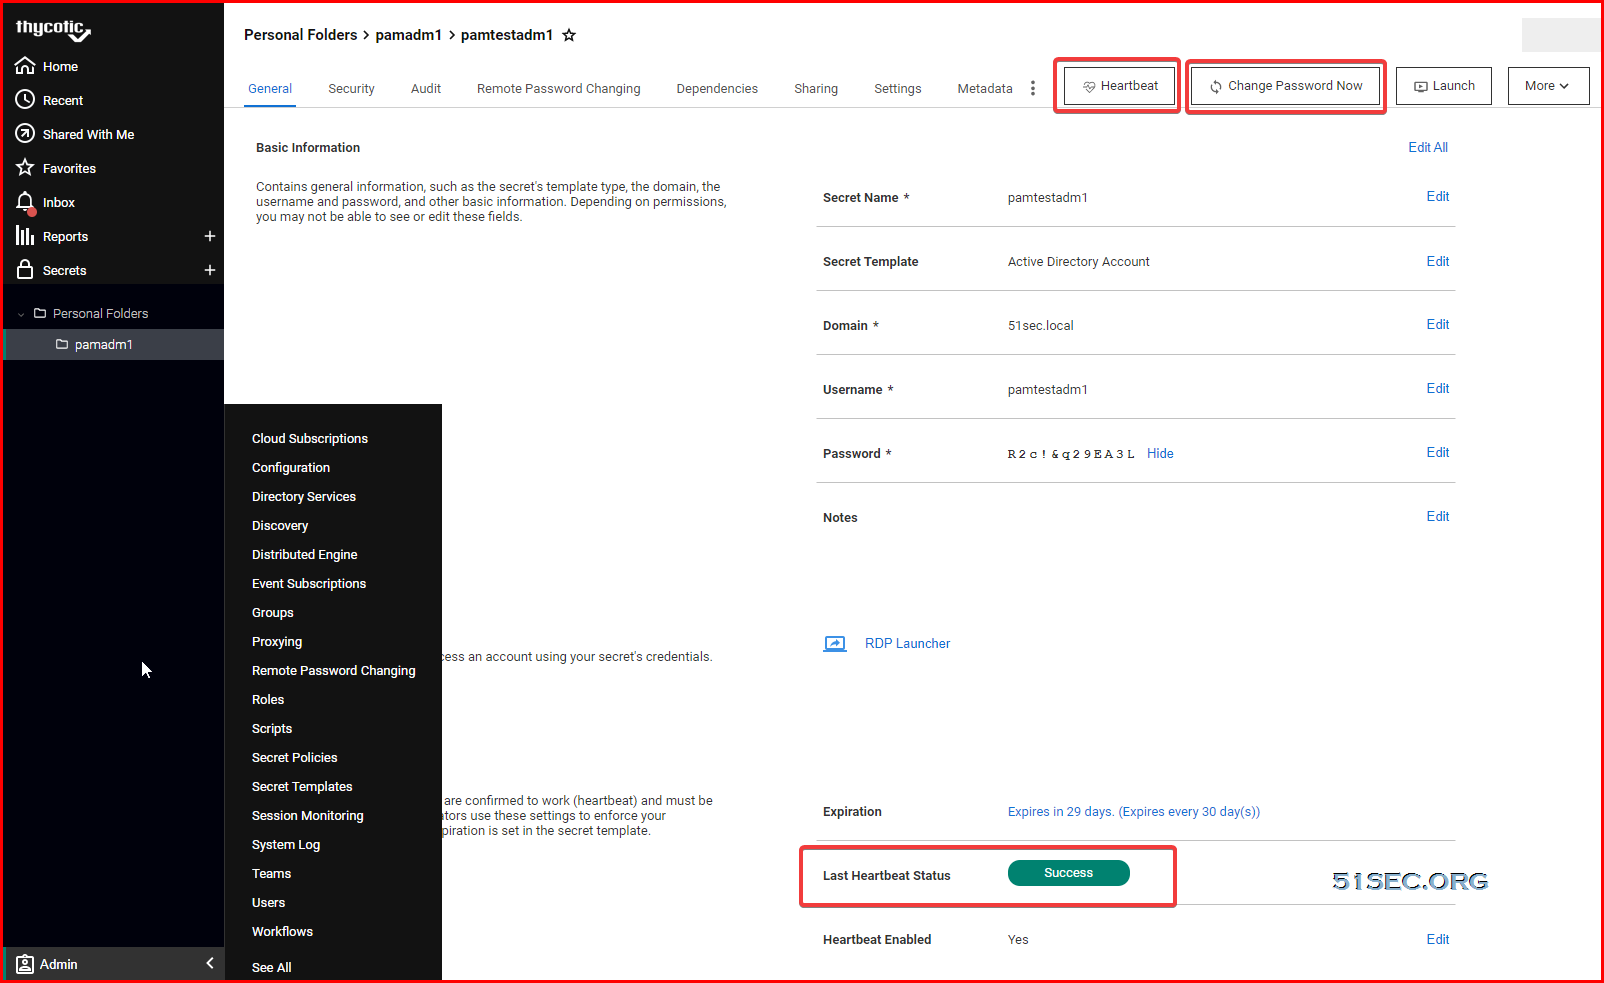
Go to the secret you created for domain synchronization in the previous section or create a new test secret to use.
-
A brand new secret’s Last Heartbeat status should be pending or processing. Once heartbeat completes you should one of these statuses:
- Unable to Connect: SS could not reach the target machine. This could be a firewall issue or the machine name or IP address is wrong.
- Failed: SS could connect but could not authenticate. This likely means the password on the secret is incorrect.
- Success: SS successfully connected with the username and password.
-
You can test password changing by viewing a secret and clicking the Change Password Remotely button.
Note: This will change the password on the target system.
-
You can view the status of password changes and heartbeats in the log at Admin > Remote Password Changing.
from Blogger http://blog.51sec.org/2021/07/thycotic-secret-sever-cloud-distributed.html